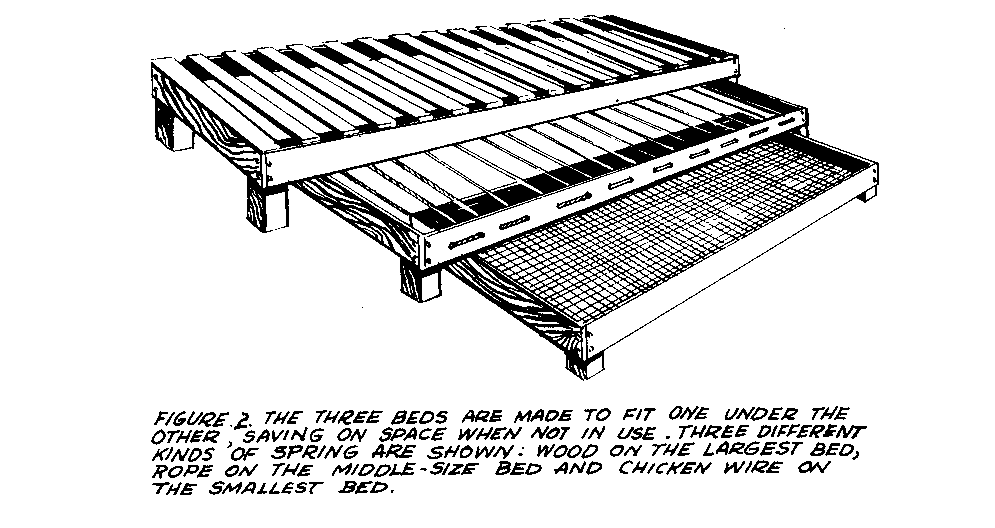
This nest of three beds will save space in a small room during the daytime because it takes up only the space needed for one bed. The beds are low in cost and easy to make from local materials. Dimensions suggested here are approximate. The exact dimensions depend on the kind of wood used.
Tools and Materials
Carpenter's tools Wooden boards 2.5cm x 7.5cm (1" x 3"), of varying lengths Wooden posts 5cm x 5cm (2" x 2"), of varying lengths Nails Paint Baling wire, burlap strips, rope, or wood for the "spring" of the beds.
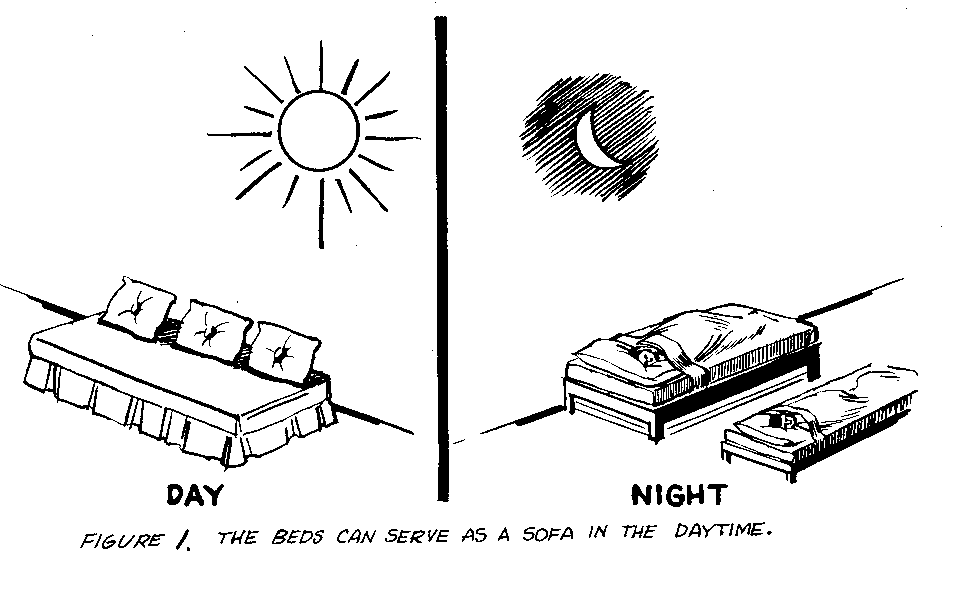
All of the beds are the same width but the length and height of each bed varies so they fit under each other. The nest of beds can then be used as a sofa in the daytime (Figure 1).

The wood used in the largest bed is:
o 2 boards, 2.5cm x 7.5cm x 183cm (1" x 3" x 72") o 2 boards, 2.5cm x 7.5cm x 91.5cm (1" x 3" x 36") o 4 legs, 5cm x 5cm x 51cm (2" x 2" x 20')
Nail the legs to the ends of each of the 91.5cm (36") boards. Then join these boards by nailing the 183cm (72") boards to them as in Figure 1. This completes the framework, which is now ready for the spring to be attached.
The spring can be made by nailing baling wire, burlap strips used as webbing, or wood to the frame. Another method is to bore holes in the framework and pass rope through the holes as shown in the middle-size bed in Figure 2.

The other two beds are made the same way. They use the following materials:
Middle-size bed:
o 2 boards, 2.5cm x 7.5cm x 168cm (1" x 3" x 66") o 2 boards, 2.5cm x 7.5cm x 91.5cm (1" x 3" x 36") o 4 legs, 5cm x 5cm x 38cm (2" x 2" x 15")
Smallest bed:
o 2 boards, 2.5cm x 7.5cm x 152cm (1" x 3" x 60') o 2 boards, 2.5cm x 7.5cm x 91.5cm (1" x 3" x 36") o 4 legs, 5cm x 5cm x 25cm (2" x 2" x 10")
HOW TO MAKE A MATTRESS
This low-cost mattress is made from materials available in most areas. It can be used as a bed at night and as a sofa by day. The mattresses are widely used.
Tools and Materials
Cotton Corn shucks, rice or wheat straw, hay, banana or palm leaves Smooth, heavy cloth (ticking) Strong needles Waxed cord Oil felt or double-thickness ticking cut in a round shape, for tufts Hand paddle with small nails Sharp knife
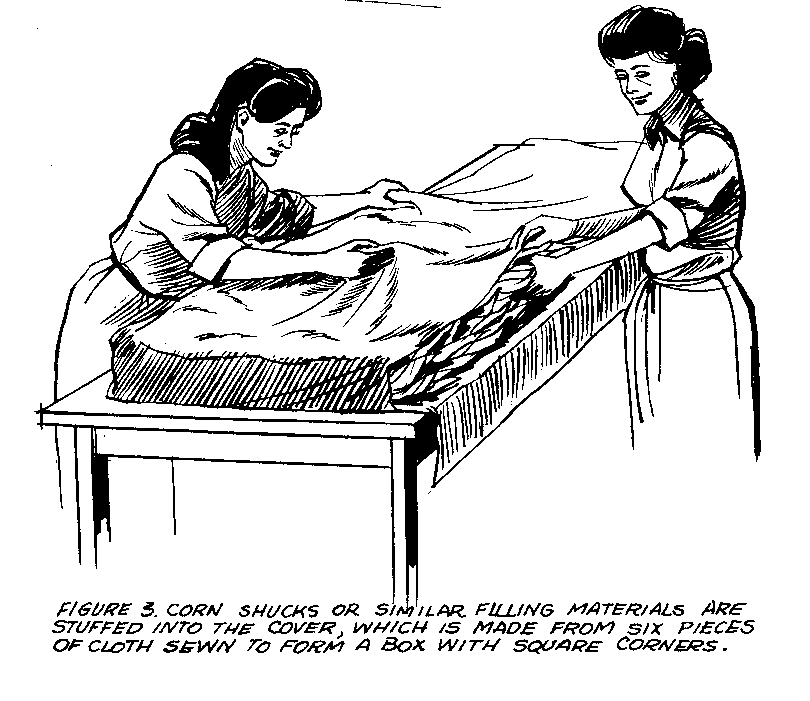
Making the Mattress <see figure 3>

The first step is to dip the corn shucks in boiling water and, while they are still moist, shred them into small strips with a hand paddle that has small nails in it. The tough top part of the shuck is then cut off with a sharp knife. When dry, the shredded corn shucks are ready for use.
Cut six pieces of cloth as follows:
- two pieces the size of the bed, to make the top and bottom of the mattress.
- two pieces 15cm (6") wide and the length of the bed for the mattress sides.
- two pieces 15cm (6") wide and slightly longer than the width of the bed, for the ends of the mattress.
Sew the pieces together to form a box with rounded corners. Attach the bottom piece on just one side, leaving the bottom open for filling the mattress. Twelve feed sacks full of tightly-packed corn shucks are enough for a double-bed mattress. A single bed mattress needs less.
Pack the filling material into the cloth cover in even layers. Otherwise the mattress will be lumpy. After each layer, pull the bottom piece over the filling material and beat the mattress gently to distribute the material evenly. Then pull the bottom piece back and continue filling the mattress. When the mattress is filled, sew the bottom piece in place. If there are still high and low spots in the mattress, beat it gently again: hitting the high spots to drive the filler into the low spots. Only a few strokes should be needed.
Making a Rolled Edge
A rolled edge will keep the cotton in place and help the mattress to hold its shape. Mark a faint fine 6cm (2 1/4") in from the edge seam all around the mattress top. Mark another faint line 1.5cm (1/2") below the seam. Sew the two lines together with stitches about 1.5cm (1/2") apart, working enough filler into the roll with each stitch to make the roll firm. Fill the roll evenly. In rounding the corners, make the stitches closer and take shorter stitches on top of the roll than on the bottom.
Turn the mattress over and make a roll edge on the other side.
Use a strong needle and waxed cord to sew the round pieces of oil felt or doubled ticking for simple tufts that will hold the filling in place.
More detailed instructions are given in: Making a Cotton Mattress, Federal Extension Service, U.S. Department of Agriculture.