Home Improvement <see image>

PLUNGER TYPE CLOTHES WASHER
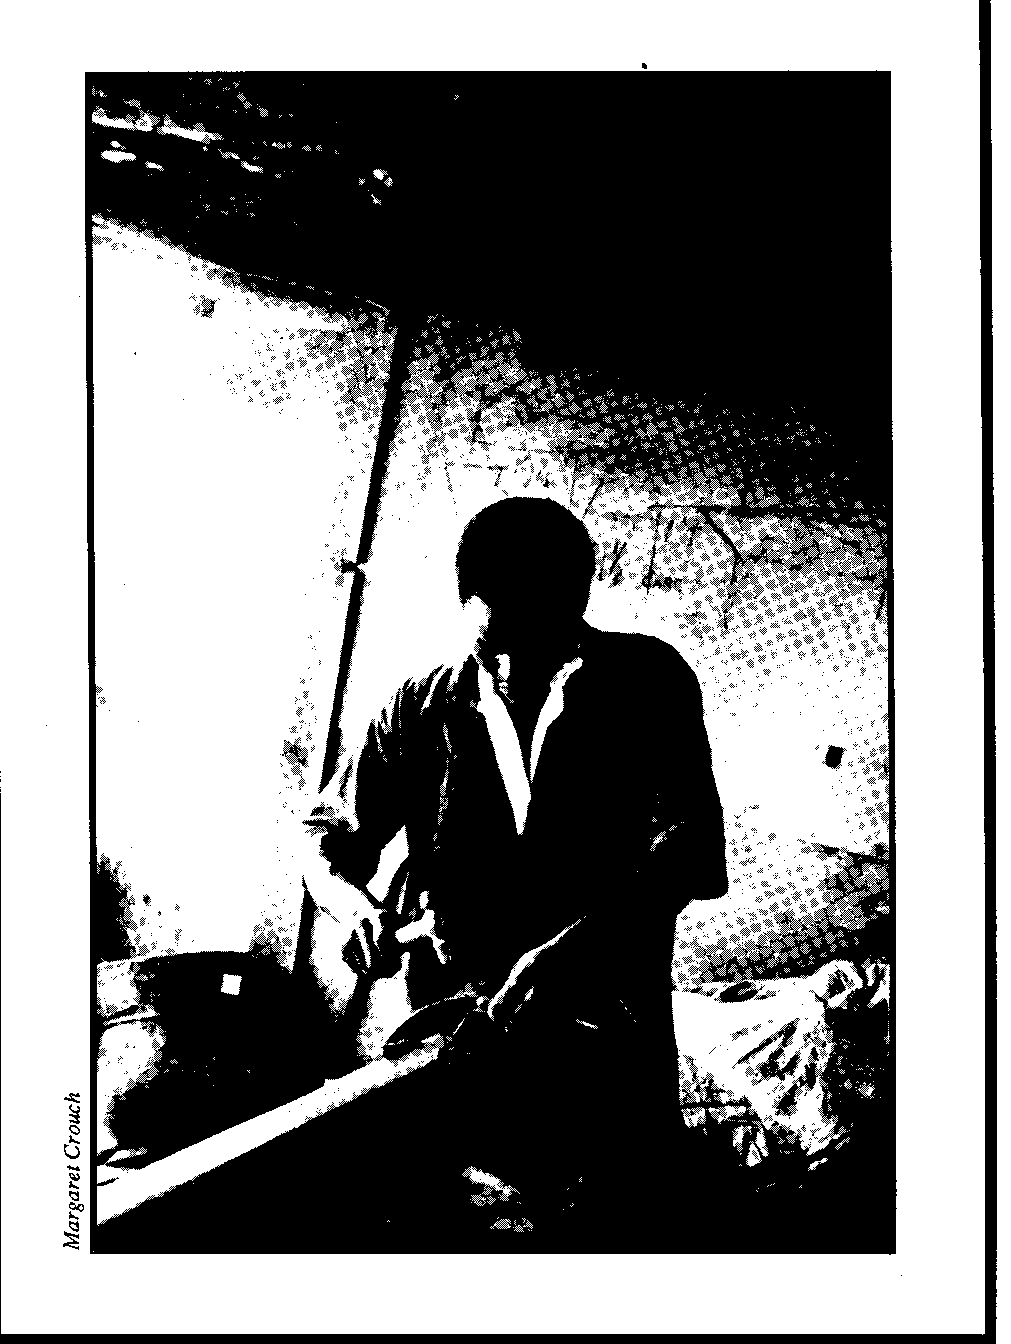
This hand-operated washer, which is simple for a tinsmith to build, makes washing clothes easier. It has been used successfully in Afghanistan.
Tools and Materials
Tinsnips Pliers Hammer Soldering equipment Heavy galvanized sheet metal: 140cm x 70cm (55 1/8" x 27 9/16") for tub 100cm x 50cm (39 3/8" x 19 11/16") for lid and bottom 36cm x 18cm (14 3/16" x 7 1/16") for agitator Wooden handle 140cm (55 1/8") long, about 4cm (1 1/2") diameter
Making the Washer
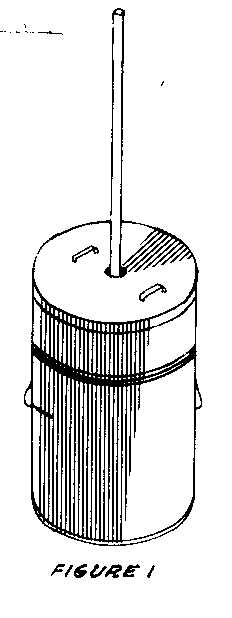
Figures 1 to 4 show how this washing machine

is made. The tub, lid, and agitator are made of heavy galvanized sheet metal.
Using the Washer
To operate the washing machine, work the agitator up and down with a quick motion but with a slight pause between strokes. The movement of the water caused by the agitator will continue for a few seconds before additional agitation is needed. On the upward stroke the agitator should come completely out of the water. The agitator should not hit the bottom of the tub on the downward stroke because this would damage both the tub and the clothes.
Source:
Dale Fritz, VITA Volunteer, Schenectady, New York
HAND-OPERATED WASHING MACHINE
This easily-operated washing machine can be built by a good carpenter from materials easily found in most countries. It is easy on clothes, effective, and sanitary. The machine, which can take 3-kilogram (6-pound) load of clothes, can be shared by several families.
Clothes will last much longer if they are washed in this washing machine rather than beaten or scrubbed on rocks. Washing with the machine is also much less work. Under test conditions, a comparison with standard electric commercial washers was very favorable. If the cost of the machine is too much for one family, it can be used by several. However, if there are too many users, competition for times of use will become keen and the machine will wear faster.
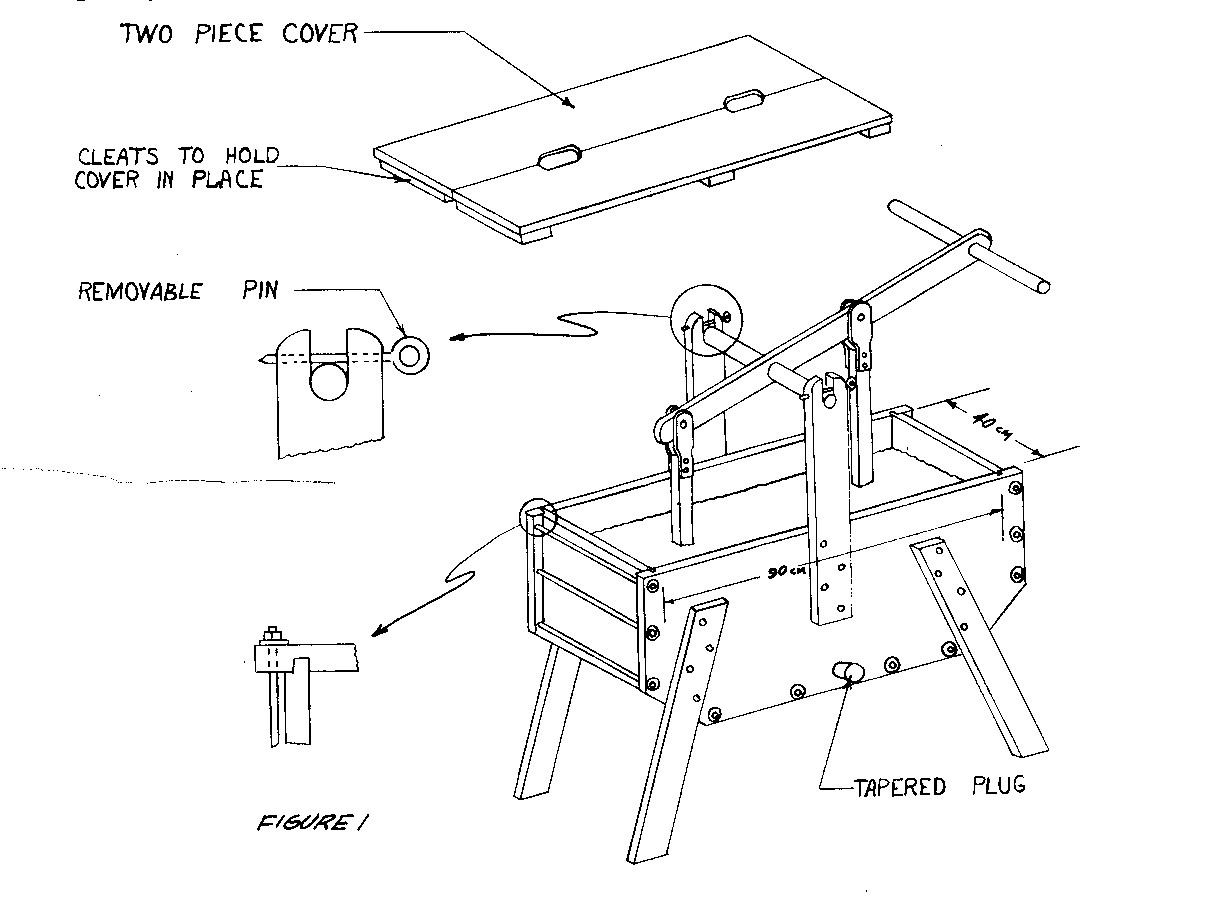
The machine reverses the principle used in the usual commercial washer, in which the clothes are swished through the water for various degrees of a circle until the water is moving, and then reversed. In this machine, the clothes stay more or less stationary while water is forced back and forth through the clothes by the piston action of the plungers. One plunger creates suction as it rises and the other plunger creates pressure as it moves downward. The slopes at the ends of the tub bottom help the churning action of the water caused by the plungers (see Figure 1).

A rectangular tub is best for this method of operation. This is fortunate since the rectangular box is easy to build. In general, any moderately strong wood that will not warp excessively (such as cedro in Latin America) will be satisfactory. The sides should be grooved for the ends and bottom of the tub as indicated in Figure 1 and bolted with threaded rods extending through both sides with washers to draw them tight. The bolting is necessary to prevent leaks.
The size described in the drawings is large enough for an average family in the United States. The same principle may be used for a larger or smaller machine provided the basic proportions are maintained. The tub should be slightly less than half as wide as it is long to get a proper surge of water. The pistons should be wide enough to move within a couple of inches of each side of the tub. The lever pivot should be high enough to permit the plungers to move up and down several inches without the edge of the lever hitting the edge of the tub. Likewise, the length of the rods on the plungers must be such that the plungers go well into the water and the clothes, and then come completely out of the water at the highest position.
Tools and Materials
Tub Construction - Moderately firm soft-wood free from large heartwood growth:
Tub
Sides-2 pieces, 2.5 x 45.7 x 96.5cm (1" x 18" x 38") Ends-2 pieces, 2.5 x 30.5 x 40.6cm (1" x 12" x 16") Bottom-2 pieces, 2.5 x 15.2 x 40.6cm (1" x 6" 16") Bottom-1 piece, 2.5 x 40.6 x 66.0cm (1" x 16" x 26") Legs-4 pieces, 2.5 x 10.2 x 76.2cm (1" x 4" x 30")
Round Plungers
2 pieces, 2.5 x 25.4cm diameter (1" x 10" diameter) 2 pieces, 3.8 x 12.7cm diameter (1.5" x 5" diameter)
Cover (may be omitted)
2 pieces, 2.5 x 20.3 x 91.4cm (1" x 8" x 36") 6 pieces, 2.5 x 7.6 x 20.3cm (1" x 3" x 8")
Operating parts - Moderately firm hardwood:
Lever-1 piece, 2.5 x 7.6 x 122cm long (1" x 3" x 48") Plunger stems-2 pieces, 2.9cm square 38.1cm long (1 1/8" square 15" long)
Uprights
2 pieces-2.9 x 7.6 x 61.0cm long (1 1/8" x 3" x 24")
Pivot and Handle
2 pieces, 3.2cm diameter x 45.7cm long (1 1/4" diameter x 18")
Metal Parts
Plunger connections
4 pieces iron or brass plate, .64 x 3.8 x 15.2cm long (1/4" x 1 1/2" x 6")
10 rods, 3.6 or .79cm diameter (1.4" or 5/16") 45.7cm (18") long with threads and nuts on each end--iron or brass
20 washers about 2.5cm (1") diameter with hole to fit rods
1 rod, .64 x 15.2cm long (1/4" x 6") with loop end for retaining pivot
6 bolts, .64 x 5.1cm long (1/4" x 2" long)
24 screws, 4.4cm x #10 flat head (1 3/4" x #10)
50 nails, 6.35cm (2 1/2")
Strip sheet metal with turned edge, 6.4cm wide, 152.4cm long (2 1/2" wide, 72" long)
Small quantity of loose cotton or soft vegetable fiber for caulking seams
Minimum Tools Needed
Tape measure or ruler Hammer Saw Wood chisel 1.3 or 1.9cm wide (1/2" or 3/4") Screwdriver Pliers Adjustable wrench .64cm (1/4") drill, gimlet or similar tool Draw knife or plane and coping saw
Making the Washing Machine
Mark and groove sides for end and bottom members (see Figures 1 and 4).

Drill holes for cross bolts.
Cut off corners and trim ends of side member to length.
Bevel ends and bottom pieces to fit into groove in side members.
Miter bottom and end members together.
Assemble and bolt.
Cut and install legs.
Caulk seams between ends and bottom members with loose cotton or other vegetable fiber to make seams water-tight. If joints to side members are carefully made, they may not need caulking.
Bore hole and make plug for draining tub. NOTE: This is shown on side in drawing but it is better in bottom of tub.
Make and install upright pivot members.
Make and install plunger lever. NOTE: The cross pivot member (round) should be shouldered or notched at each pivot to prevent side movement.
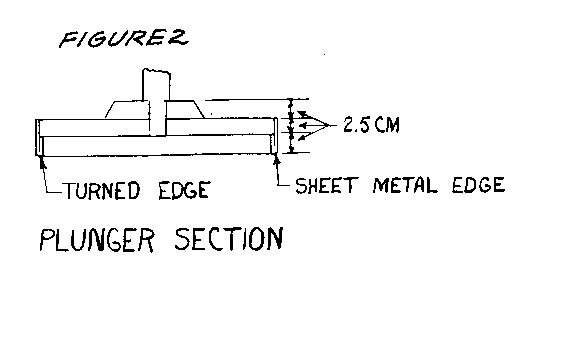
Make plungers and install (see Figures 2, 3 and 4).

Using the Washing Machine
Here are several suggestions for using this washing machine: Fill the washer with approximately 55 liters (15 gallons) of warm or hot water depending on what is available. Try to remove stains in clothing before putting it in the wash water. Rub soap into the areas of garments like cuffs and collars that come in close contact with the body. Soak very dirty clothes before putting them in the washer. Soap can be dissolved by shaving it into strips and then heating it in a small quantity of water before adding it to the wash water. A 3kg load of clothes is the right size load for best cleaning. Wash at a moderate speed, about 50 strokes a minute, for ten minutes--longer if it seems necessary.
If more than one load of clothes is to be washed, some basic procedures will help to simplify the job and conserve water. (Water used for washing and rinsing can help irrigate a garden plot.)
First divide the clothes so that whites and light colors are separate from dark clothes. Try to keep small items together so they won't get lost. Heavily soiled or greasy clothes should be washed alone.
Wash the white or light-colored things first in the hottest possible water (remember that you will have to handle the wet clothes--don't get the water too hot!), then move on through darker clothes. The water will become discolored. Much of the color is dirt, of course, but some is excess dye. The lightest clothes are washed in the cleanest water; dark clothes won't be as noticeably affected by the coloring matter in the water.
After each load, the wash water can be warmed, if necessary, by adding some boiling water. A bit more soap may also be needed. Probably at least three loads of clothes--depending on how dirty they are--can be washed before the water becomes too murky to be used again.
The clothes, of course, will have to be rinsed thoroughly. Soap or detergent residues can damage fabrics and may cause allergic reactions. Two rinses are usually necessary.
Probably the easiest, but most expensive, procedure is to have separate tubs for rinsing. Tubs can be of either wood or galvanized metal, and may be used for other purposes provided they are cleaned thoroughly on wash day.
When clothes are clean, squeeze out as much excess water as possible and put them into the rinse water. The next load of wash can be soaking while the first is rinsed and put to dry. Then the clothes in the machine are washed and the process repeated.
If no separate rinse tubs are available, wash up to three loads (if the water stays clean enough that long) and set each aside. Be sure to keep loads separate, as dyes from wet clothes may stain lighter colored fabrics. Then drain and rinse the washing machine and refill it with clean water. Rinse the clothes, again starting with the lightest colored load, and put out to dry. Repeat the whole wash-rinse process as often as necessary.
Another method is to wash the first load of clothes and squeeze out excess water. Drain the wash water and refill the machine with clean warm water. Rinse the clothes, squeeze out excess water, and put to dry. Warm the rinse water with boiling water and and some soap. Then wash the next load. Repeat the procedure as often as necessary.
After washing and rinsing the clothes, rinse the washer clean and then replace the stopper. To keep the wood from drying out and causing the tub to leak, put about 3cm (1") of water in the washer when it is not in use.
Source:
Petit, V.C. and Holtzclaw, Dr. K. How to Make a Washing Machine. Washington, D.C.: U.S. Agency for International Development.